10 Physical Therapy Exercises for Lower Back After Surgery
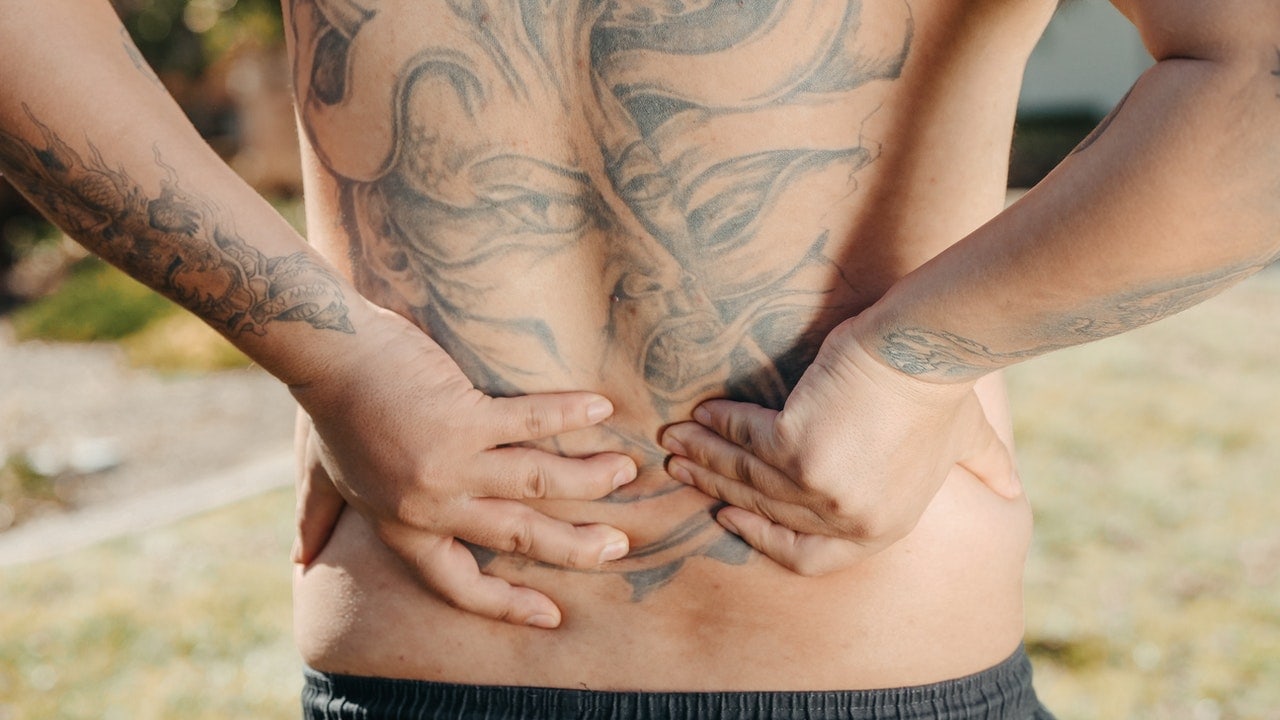
Surgery is an invasive process to treat the disorders of the body. Surgery can range from minimally to highly invasive depending on the nature of your diagnosis. In either case, the impact of the injury and surgical correction results in multiple levels of soft tissue distortion.
Exercisesafter lower back surgery plays a critical role in the recovery of these injured tissues.
It helps to prevent/correct muscle atrophy/weakness.It activates superficial and deep muscles of low back for the stability and mobility of the spine. It helps to reduce pain and regain lost motion.
Appropriateness of the exercise is dependent on the type of the surgery, involvement of the surgery, your general health and the Surgeon’s preference. During the Surgery, your Surgeon gets to see the level of tissue and/or structure damage which then helps him/her set guidelines for your recovery. For best outcomes, you have to work with your Surgeon and your therapist, following their instructions and guidelines. It is no doubt, however, that core exercises after lower back surgery will help.
Here are some physical therapy exercises for lower back after surgery that can be beneficial. Before doing any of these core exercises, please consult your surgeon and/or physical therapist to make sure they are appropriate for you.
1. Isometric abdominal exercises.
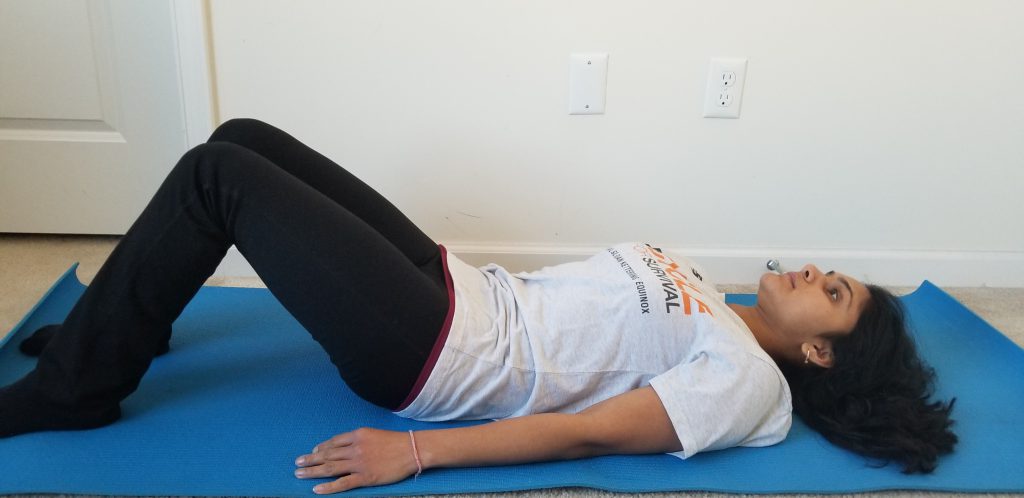
- Begin lying on your back
- Gently hold your lower belly in or tuck your belly button into the spine
- Hold for count of 2
- Now Relax.
- Do not hold your breath while doing this exercise. Do not Lift your head up during this exercise.
2. Isometric abdominal with Arm movements
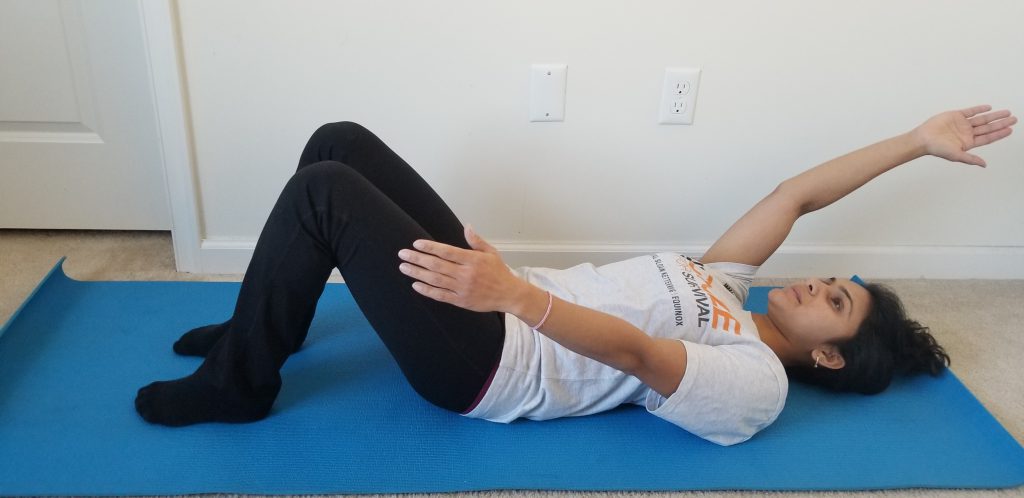
- Begin Lying on your back
- Gently hold your belly in or tuck your belly button into the spine
- Now lift one hand over your head.
- Lower it back
- Alternate with the opposite arm
- If you feel your back arching off the table, stop.
3. Isometric abdominal with Leg movements
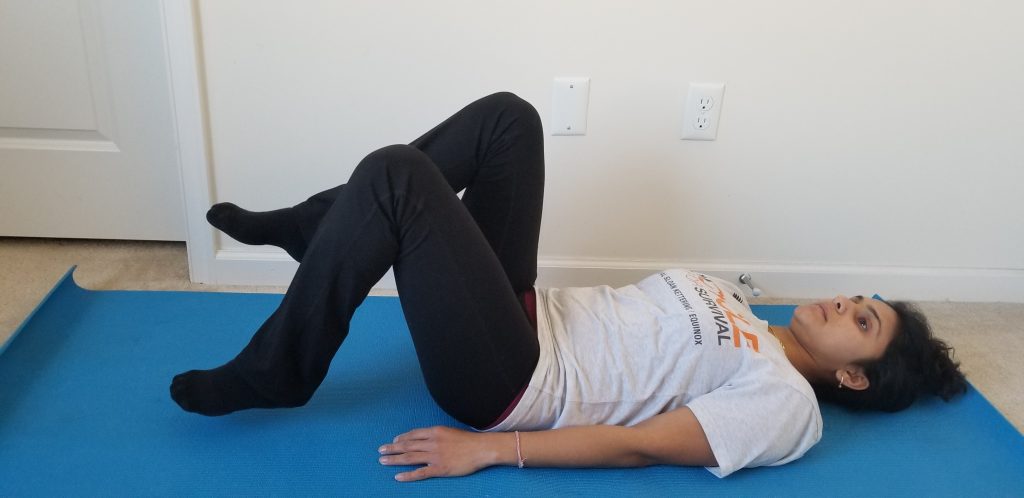
- Begin Lying on your back
- Gently hold your belly in or tuck your belly button into the spine
- Now lift both knees up to you such that they are at a 90-degree angle.
- Now slowly, lower one leg while holding the other leg up. Keep your knees bent, you do not need to straighten your knees.
- Bring the leg up and alternate with the opposite leg
- If you feel your back arching off the table, stop.
4. 3 month position
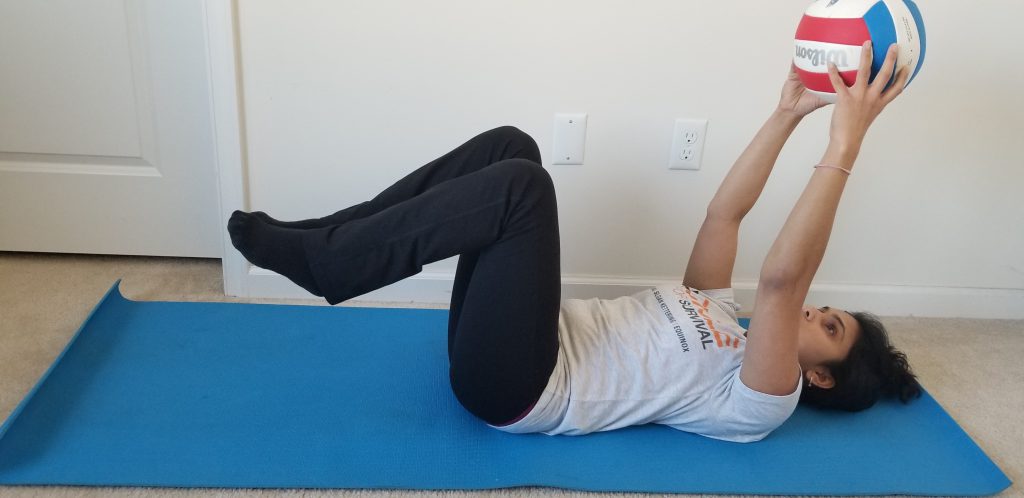
- Being by lying on your back
- Lift your legs and arms up into a 90/90 position and hold it
- Gently breathe into your lower belly as you hold this position
- If you feel your back arching up, lower your legs and take a break
- Alternately, you can hold a ball in your hands and raise it over your head
5. Quadruped alternating Arm raises
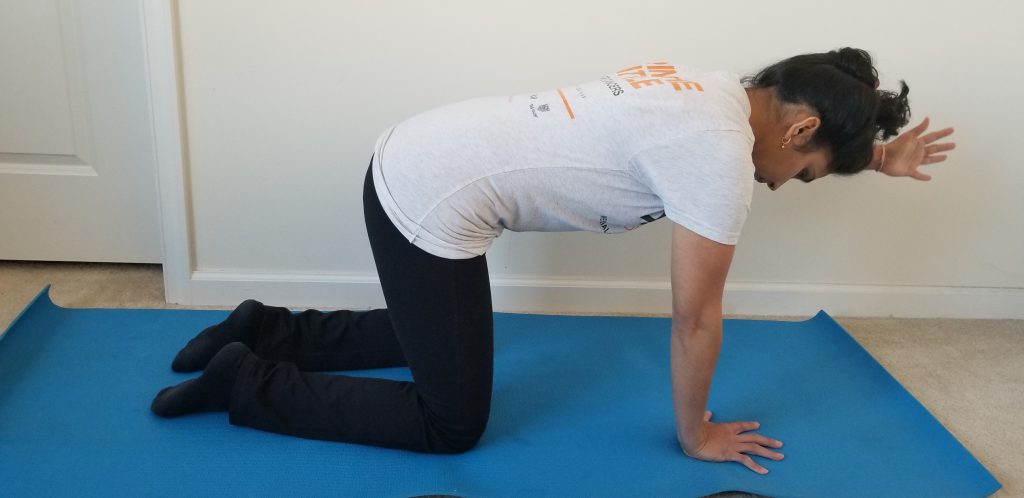
- Begin on your hands and knees. Make sure your hands are even in line with your shoulders and your knees are in the same line of your hips
- Holding your back steady (you can always imagine there is book on top of your back and it should not fall), lift one arm up.
- Lower the arm to starting position
- Alternate with the opposite arm
6. Quadruped alternating Leg raises
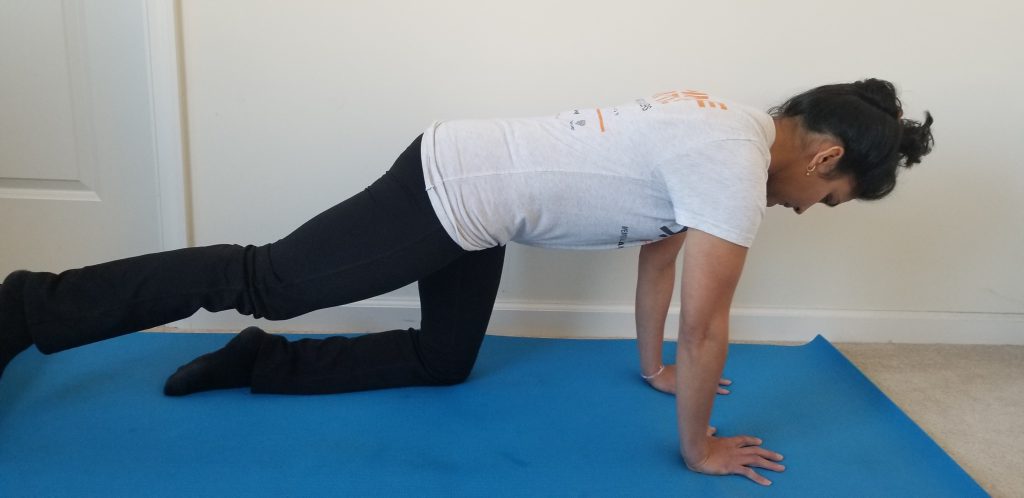
- Begin on your hands and knees. Make sure your hands are even in line with your shoulders and your knees are in the same line of your hips
- Holding your back steady (you can always imagine there is book on top of your back and it should not fall), kick one leg out and tap the floor with your toe (i.e. donkey kick).
- Lower the leg to starting position
- Alternate with the opposite leg.
- Make sure you don’t kick your leg up and back as it may cause low back discomfort
7. Sit to stands
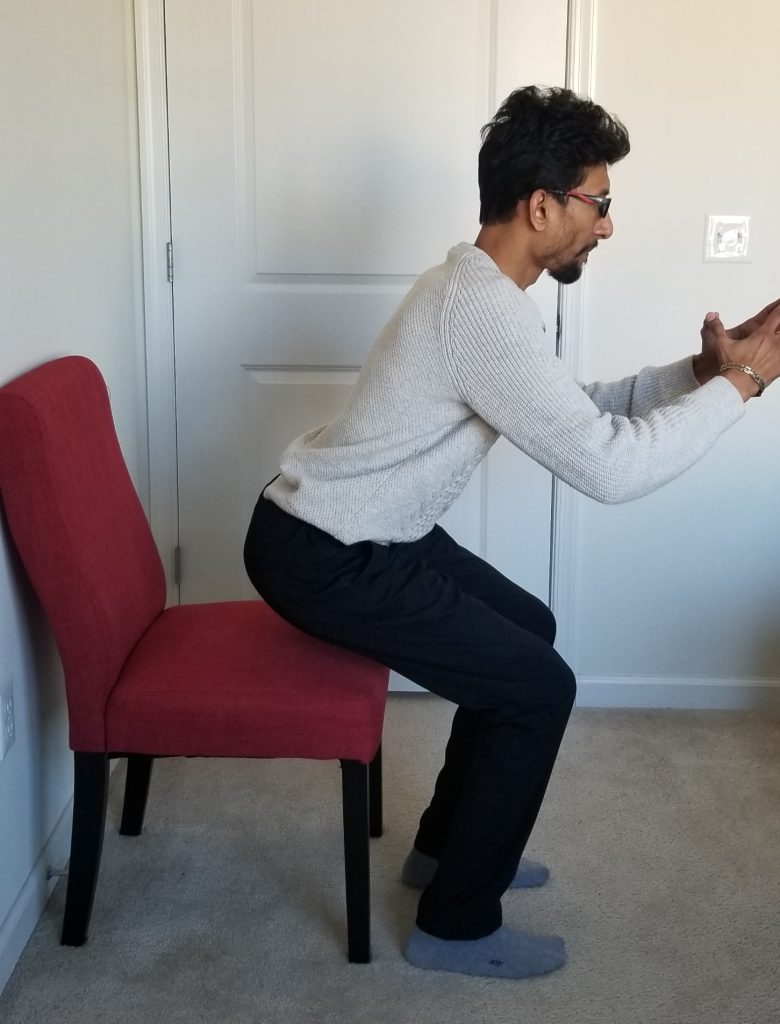
- Stand in front of a chair
- Keeping your feet shoulder width apart, bend at the hips, slowly lower your buttock into the chair, as if you are planning to sit.
- Tap the chair and stand up.
- You can use kitchen counter, ledge or sturdy support in front off you to help with his exercise.
- Make sure your knees don’t go past your toes, or the back of the leg does not touch the chair
8. Mini Lunge
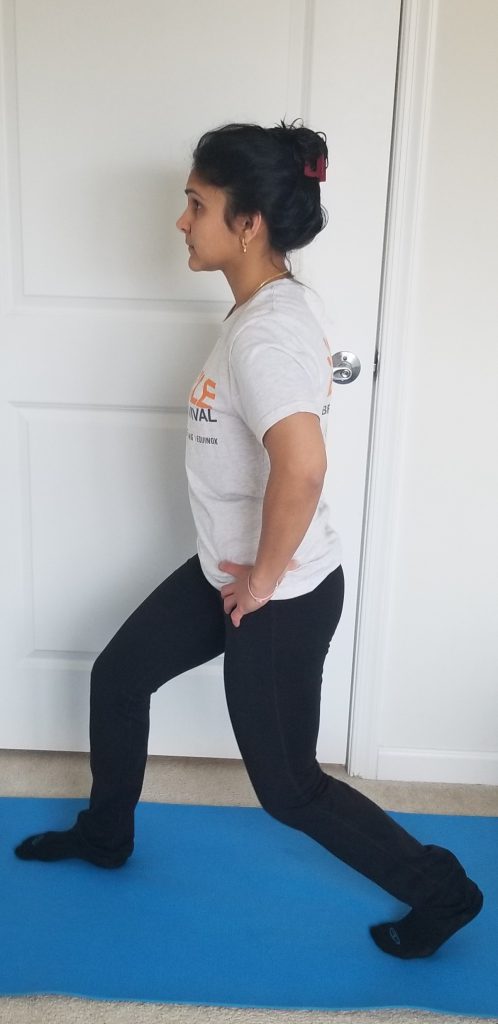
- Take a large step and stand with your feet in a staggered stance (one leg in front of the other)
- Hold on to one side with a sturdy surface like kitchen counter or ledge for support
- Slowly bend at both knees into a 45 degree bend, keeping your back straight
- Hold for count of 5 and come back into standing position
9. Kneeling with ball lift
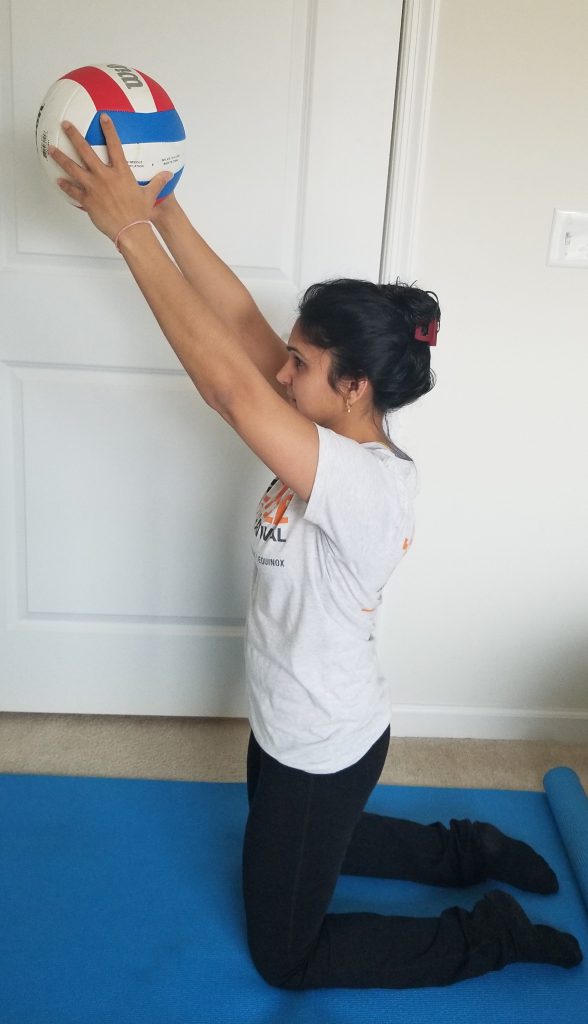
- Place a mat or a pillow on the floor
- Kneel on both knees
- Staying upright, make sure your hip and head are in the same line (i.e. straight)
- Hold a ball in your hands
- Straighten your elbows
- Slowly, raise your arm over your head, keeping your body straight
- Hold to the count of 5
- Slowly, lower your hands
- Don’t hold your breath. Don’t arch your back when you raise your arm overhead.
10. Standing alternating arm and leg flexion
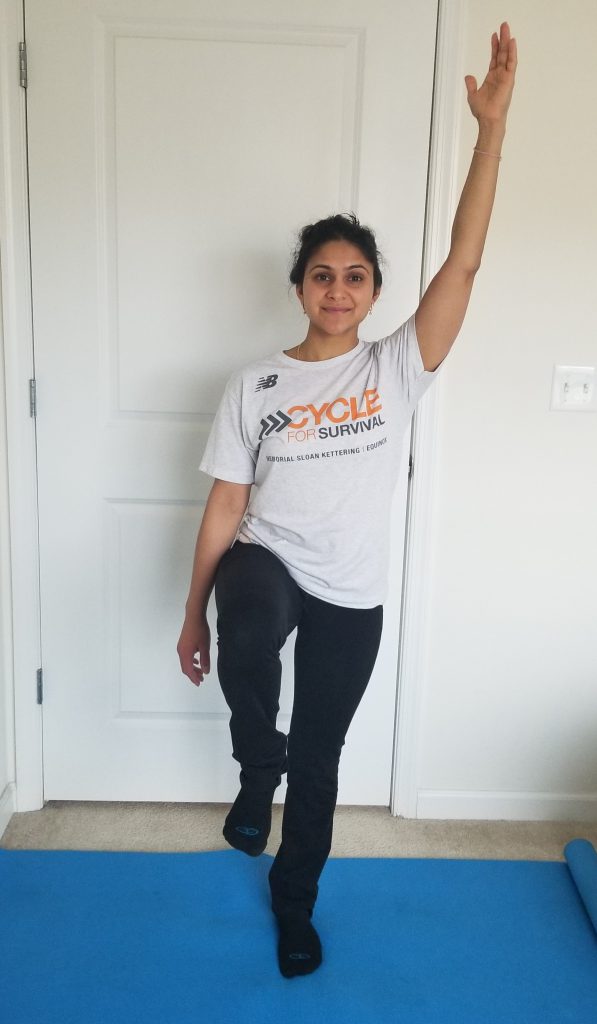
- Stand straight but relaxed
- Make sure you are doing this exercise with opposite arm and leg
- Lift the Left arm over your shoulders
- Simultaneously, flex your right hip, raising your Right knee up to your hip
- Do not twist your trunk
- Return to starting position
Disclaimer: All content found on the physisrehab.com and this blog, including: text, images, audio, or other formats were created for informational purposes only. The Content is not intended to be a substitute for professional medical advice, diagnosis, or treatment. Always seek the advice of your qualified health provider with any questions you may have regarding a medical condition. Never disregard professional medical advice or delay in seeking it because of something you have read on this blog or website. Physis Physical Therapy does not recommend or endorse any specific tests, physicians, products, procedures, opinions, or other information.